If, when attempting to access Gosocket, your user account does not appear to be registered, it is possible that your company has not yet completed its activation process within the platform.
Currently, registration can no longer be performed directly from the Gosocket portal, as the registration option is no longer available. Activation must be completed exclusively through the activation link included in the invitation email sent by your host customer.
Requirements: Before starting the process, make sure you have the following:
- The invitation email sent by your host customer.
- The activation link included in the invitation email.
- The activation code indicated in the invitation.
- Your company's Tax ID (TIN, VAT number, RUC, NIT, or equivalent legal identification number, depending on the country).
- The host customer's Tax ID (the customer who sent the invitation and to whom you will submit invoices).
Steps to Activate Your Company and Create Your Account
1. Locate the Invitation Email
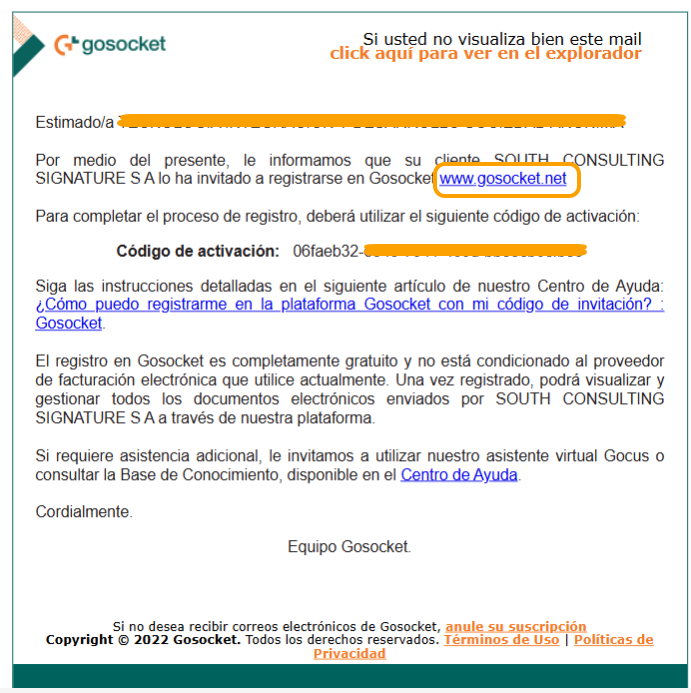
Check your inbox and find the invitation email sent to join Gosocket. This email contains:
- The activation link.
- The activation code required to complete the process.
2. Access the Invitation Link
Click the link included in the invitation email. This is the only available method to create your account and activate your company within the platform at www.gosocket.net.
3. Complete the Activation Process
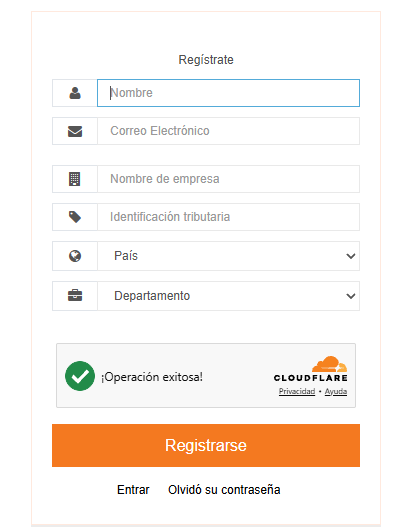
During the activation process, you will be asked to provide the following information:
- Your company's Tax ID (TIN, VAT number, RUC, NIT, or equivalent legal identification number, depending on the country).
- The host customer's Tax ID (the customer who sent the invitation and to whom you will submit invoices).
- The activation code received in the invitation email.
- Complete the user account creation form.
Please ensure that all information entered matches exactly the details provided in the invitation.
4. Create Your User Account
Once the information has been validated, you will be able to create your Gosocket login credentials.
The user who completes this process will be configured as the Company Administrator, with permissions to:
- Manage company information.
- Validate company-related operations and processes.
- Monitor and follow up on activities within the platform.
- Manage users and platform settings according to the available permissions.
- Password Recovery or Reset
If, after activation, you experience issues accessing your account, you can reset your password using the "Forgot your password?" option available on the Gosocket login page.
You will then receive an email containing instructions to create a new password and regain access to the platform.
Important Considerations
Important: New user registrations can no longer be completed directly through the Gosocket portal. Account creation must be performed exclusively through the invitation link sent by email.
If you cannot find the invitation email, please check your Spam or Junk Mail folders. If you are still unable to locate it, request that a new invitation be sent.
If you want more than one user to have access to the document viewing and validation features on the Gosocket platform, you must create a new user within your company as follows:
1. Go to the billing platform at https://www2.gosocket.net using a company administrator account.
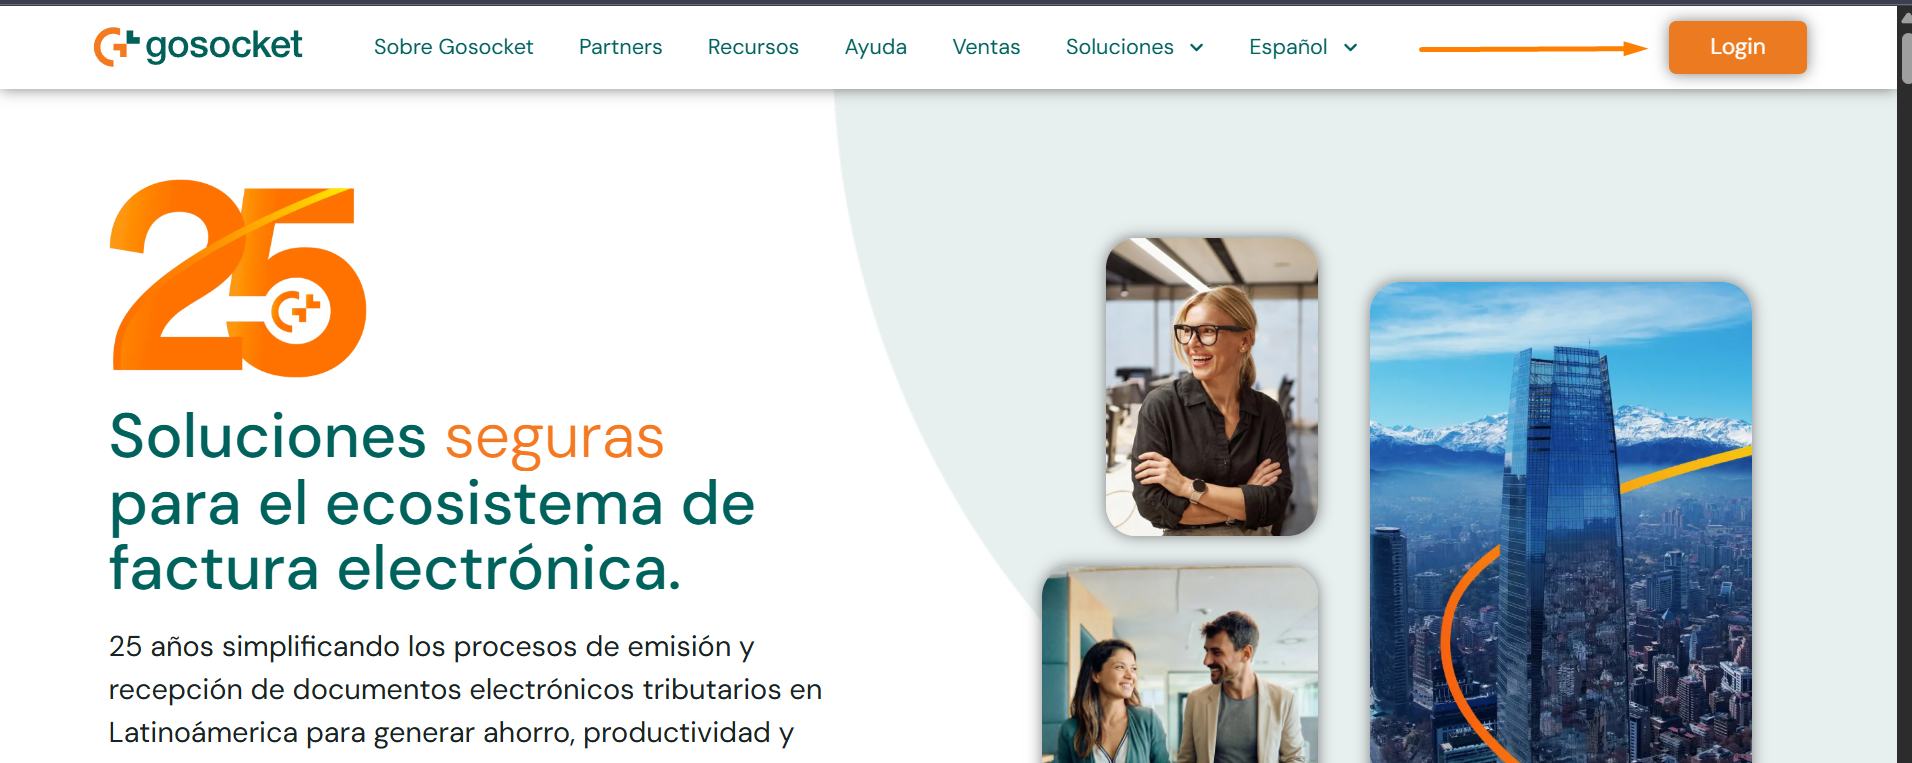
2. Click on Login.
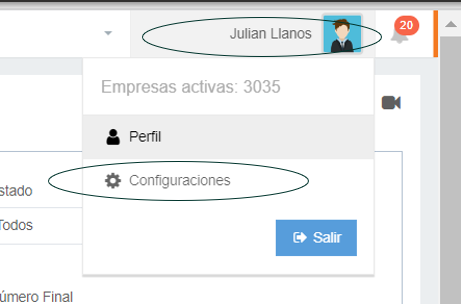
3. Click on the profile icon located in the upper‑right corner. A menu will be displayed; select the Settings (Configuraciones) option.
4. In the Settings (Configuraciones) tab, click on Users (Usuarios).
5. Click on the Add User (Agregar Usuario) option.

Note: Here you can add new users or modify existing ones so they can access the platform under your company’s ID.
Was this article helpful?
That’s Great!
Thank you for your feedback
Sorry! We couldn't be helpful
Thank you for your feedback
Feedback sent
We appreciate your effort and will try to fix the article


